Showing posts with label diy. Show all posts

Friday, May 22, 2015

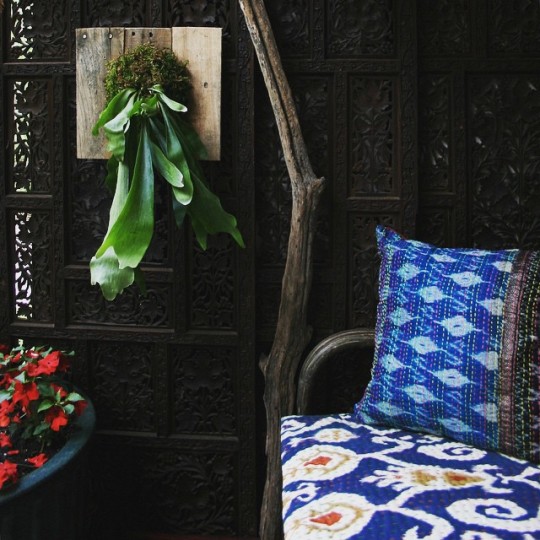
diy mounting a staghorn plant

I have been admiring hanging staghorn plants on walls for a long time but never had the chance to have one myself. I love the antler shaped fronds. They survive by attaching roots to other plants and absorbing water through fronds. Daily misting and light fertilization keep the staghorn fern thriving. Pre-mounted ones are usually expensive. Since I had some leftover pallet wood from my last project I tried mounting one for myself. All I needed was a staghorn plant, a board, some peat moss and spanish moss, fishing line and screws. (I also used a cordless nail gun and a cordless screw driver)


I first cut pallet wood and made a board by attaching 3 pieces to a cross member using my nail gun. I made the board large enough to hold the plant. 


Wire strung between two screws allow the board to be hung on a wall.


On the front of the board I placed four screws as shown.


First I put a little mound of peat moss for the nutrition. "A horticulturalist at the University of Connecticut recommends a mixture of 3 parts of peat to 1 part to perlite and then adding sphagnum moss or horticultural charcoal." I just used peat moss. Some recommend soaking the peat moss over night. I didn't:) 


And then placed the plant on the mound.


I covered the fern roots with spanish moss and used fishing line to hold the plant in place by criss-crossing between the 4 screws multiple times (mine was a heavy duty fishing line I already had around the house, thinner the better visually) and voila. Its's done.


Finished and hanging on my balcony. I added more spanish moss to cover the fishing line.


Love the rustic look. Hopefully I will not kill the plant, fingers crossed:)

Happy weekend!xx


Friday, May 1, 2015

diy driftwood ladder

One of the warmest days of Spring I escaped to the beach where I also found some driftwood for my next project. Yes here I am again with one of my small projects. I had a long time desire to make a driftwood ladder. They look rustic yet fit in most any decor. These ladders look so good dressed in throws, towels, blankets, magazines, jewelry or other decorative items but heck I just like to see them naked :)


Wait, it all started here. Okay, this is not me on the horizon I just wanted to share this perfect Spring moment at the beach.


Driftwood collected, cleaned, measured, marked and drilled. Although this doesn't mean I didn't have to drill a few more holes later. I am a messy and impatient person when it comes to projects and so I can make mistakes easily. When I started putting things together which was the hardest part, some holes didn't align. I ended up drilling a few more but thankfully the wood's imperfections hid my mistakes. 


I also used glue (Nail glue, or you can use wood glue too- it doesn't show here) when putting them together.


Thank God for blue tape. I use it all the time for my projects. It holds things pretty tight. The glue was left to dry over night.


Now sitting pretty in my living room. I wish the ladder wasn't the same height as my Indian door which would provide a visual contrast. But it still exceeded my expectations.


I was surprised how the joints fit so well. I cut the runs at a slight angle allowing me to twist them and find the best fit.

For this project I used; Driftwood, drill, hand saw, dowel rod, glue, plastic sheet for the mess and the blue tape.

Here are some driftwood ladders assembled differently and used for various purposes taken from Pinterest;

Drift wood ladder for towels or blankets
via Pinterest

Loving this minimalist look. Also found on calamel.jp .


via Pinterest

Catherine Op de Beeck makes furniture and home decorations using driftwood. Beautiful towel rack.

from San Giorgio Hotel on the island of Mykonos by Lambs and Lions #isolovethisplace - beached wood is just <3
via Pinterest

Also found on freshhome . Gorgeous bathroom detail from eclectic Greek Island retreat San Giorgio Hotel on the island of Mykonos.


via Pinterest

Casa Tatui by Portugese interior designer Vera Iachi. Using a mix of driftwood and sleek white painted wood makes it very interesting. Found on designfieldnotes .

interior inspiration by guida
via Pinterest

Also found on yourdecor . Obviously so loving it as a towel rack.


via Pinterest

How about using it outdoors? Found on mennaj . She says she "tied the "steps" with hamp string".


via Pinterest

Also found on heidamen . Simple and well secured.


via Pinterest

Also found on stylebyemilyhenderson .

It becomes an art piece in this funky modern vignette.


via Pinterest

Also found on 79ideas . Such a great idea for hanging clothes and shoes. The uneven driftwood adds some interest.

What do you think about driftwood in a decor, would you use them, how?

Happy weekend! xx


Friday, December 12, 2014

driftwood holiday tree

Okay, you have seen these kind of trees diy'ed on several blogs. I am not going to get into the details how I made it. You can see from the photos that they are so easy to make. I just wanted to show that there is always an alternative and easy way to make a holiday decoration for small spaces. Because of the limited space in my apartment I took advantage of the freshly painted empty wall in my living room. I have this beautiful driftwood from last summer that I collected while walking along a lake. Who knew it would end up as a tree? Simply using wires to hold the driftwood was my choice because the string light had a similar wire and I thought they all blend well together. The roe antlers were also a perfect fit for this bohemian natural style decor. I used damage free hooks to hang everything so as not to ruin the wall. Love the simplicity of it but I can always add some decorations later or since I have a newly painted chalkboard wall I may add some drawings and writings too:)

#diy #driftwood #christmastree #holidaytree #handmade #repurpose #rustic #firefly #fireflylights #holidaydecor #uoaroundyou #urhome #roeantlers #antlers #indiandoor #homedecor #myhome #interiordecor #decor #decoration #treedecor #boho #bohemian #bohohome #bohodecor #bohointeriors #apartmentdecor #globaldecor


I could have done a better job with the wiring but this only took a few minutes to make.


Added a turkey feather for the finishing touch. Of course my Amaryllis bulbs are getting ready for a great bloom. Fingers crossed.


Have a great weekend! xx


Friday, July 25, 2014

diy silver paper sack

I have been seeing cool looking metallic storage sacks lately. I just wanted to challenge myself to make one with items laying around my house. All I needed was a paper bag and silver leaf. You can also use spray paint. I think spray paint makes a dull finish, I just wanted my bag to have some sparkle.

small and medium
via notonthehighstreet

These are from notonthehighstreet , they make great storage and look good.

small
via notonthehighstreet

Love the gold one too.

Metallic Storage Bin - Urban Outfitters
via urbanoutfitters

Urban Outfitters have these online.

DIY Metallic Sacks
via almostmakesperfect

These adorable diy metallic sacks made with paper bags and spray paint by blogger almostmakesperfect.

Here is my diy story;


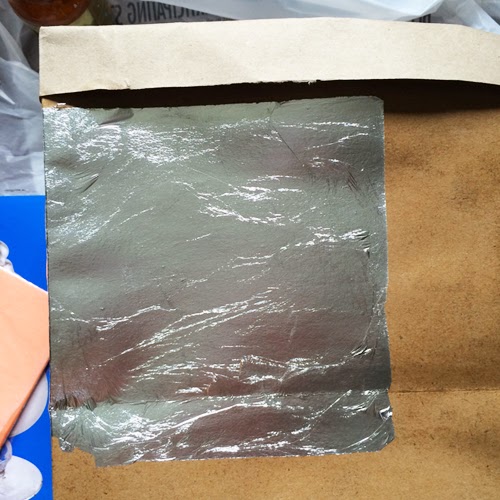
I've had this gift bag from HomeGoods for about $1. It was a perfect size for this project. I marked the top and trimmed the bag handle then folded it over once. I applied glue for the silver leaf (glue comes with the silver leafing kit).


The glue made the stiff paper bag moist, soft and more managable.


After a short drying time, the fun part of applying the silver leaf starts.


Here is the finished product. I folded one more time and shaped the paper when it was still moist. Folding is a little tricky because the paper easily rips but it can be done safely with just a tad of patience.


Detail of the silver paper bag. It has a leather look to it.

On my desk #diy silver paper sack #cactus #plants #ganesh #ganesha #boho #bohemian #bohemiandecor #bohohome #decor #homedecor #interiordecor #apartmentdecor

I think my new cactus is a perfect fit. Of course you should know that this is a paper bag and is not sealed. If you are making something like this for plants make sure to use a plastic bag or a plate inside. I chose a cactus because I water it once a month and very little, so it doesn't wet the bag. That helps:)

Happy weekend!xx


Friday, March 14, 2014

diy shelves for my collections

I have several small collections from different cultures and sometimes displaying them in my tiny apartment is tricky. When you have a small space you have to put it all to use. Finally some of my collections found a place on new diy shelves in the dining area.

My #collection #detail #chinesebedframe #shelf #shelves #african #ethiopian #ethiopiancrosses #minerals #ethiopianprocessionalcross #africanheadrest #energy #power #crystals #healing #gypsy #boho #bohemian #decor #tribal #interiordecor #africankubaboxes #woodenspinningtops #geodes #purple #love #happy #altar #amethyst #cowryshells

Collections from all over the world ( by the way, I made that cowrie shell necklace:) ) on the top shelf and gorgeous amethyst geodes from HomeGoods, Marshalls and T.J.Maxx ( who knew they sell them, right?! ) are displayed on the bottom shelf, all framed by a beautiful Chinese bed frame.

The Chinese wedding bed frame was sitting against the same wall for a while. I decided to have some fun with it. Of course my hubby was handy in this project.


Here is how the shelves look. I love thick shelves but don't know if they are a good idea in a small space, I just love their masculine, strong look. I know the shelves are not showing pretty in this picture but, all of the ugly parts are hidden behind the Chinese frame. We used 8" wide pine wood planks so they wouldn't take up much space.


This is the frame detail. The end piece was cut short so we added a thin board to cover it. We secured the shelves to the wall with a couple brackets. It was hard to do and it doesn't look so good but seriously, I don't even see the brackets:) I also painted the visible shelves with the wall color so it won't be competing with the busy frame and the collections. It also has a clean floating feel.


This is how it looks behind the Chinese frame.


My #collections #shelf #shelves #chinesebedframe #ethiopian #ethiopiancrosses #african #africanheadrest #altar #crystal #amethyst #power #healing #decor #interiordecor #africankubaboxes #cowryshells #purple #boho #bohemian #gypset #tribal #love #beautiful #happy #energy #minerals #geodes #altar

Finished shelves with the Chinese bed frame. Looks like an open shelf cabinet. It was a bold decision but, I am very happy with the result. 

Have a great weekend!xx


Wednesday, August 14, 2013

diy gold skull

#diy #skull #goldskull #amethyst #crystals #detail #closeup #decor #love

Okay, I know it is not Halloween, I just have a crush on gold skulls. I wanted to make my own diy gold skull. I found this paper one at AC Moore and my diy project starts here;

 Preparation stage. I sanded down the joints first.
 
 Then I prepared it with gold leaf adhesive.
 
After finishing the gold leafing, I did some gold acrylic touch-up. Then I made 3 holes on top. I had 3 pointy crystals that fell off of an amethyst cluster, they were a perfect fit.
 
#diy #skull #amethyst #goldskull #crystal #craft #tillandsia #airplant #love #crystals #decor
 
Here is the finished skull.
 
#diy #skull #goldskull #amethyst #oldbooks #crystals #craft #boho #bohemian #decor #interiordecor #interiordesign #love
 
Found a good place on my book shelf with my old books.